


If you’re looking to freshen up your fences but aren’t sure where to start, then this blog is for you.
Our easy-to-follow guide on how to paint a fence has tips & tricks to help you restore & maintain your fencing.
Before you start
First thing to think about is if your fence has been recently treated. If it has, you're best to wait between 3 - 6 months before applying paint as the treatment needs time to fully settle.
The next thing to consider may seem obvious, but you'll need to check if the fence you are planning to paint is yours.
If it is your neighbour’s fence you may be wondering “can I paint my side of the fence”?
If the fence is your neighbour’s responsibility then you'll need to get permission from them before undertaking any work on it including painting.
Once you have the necessary permission it's time to get started!
What will I need to paint a fence?
To paint your fence, a paint brush alone isn't enough. You're going to need other equipment too.
Fence painting equipment
- Sanding block
- Stiff or wire brush
- Pressure washer
- Tarpaulin or dust sheets
- Coveralls or old clothes
- Safety goggles
- Mask
- Painting tools
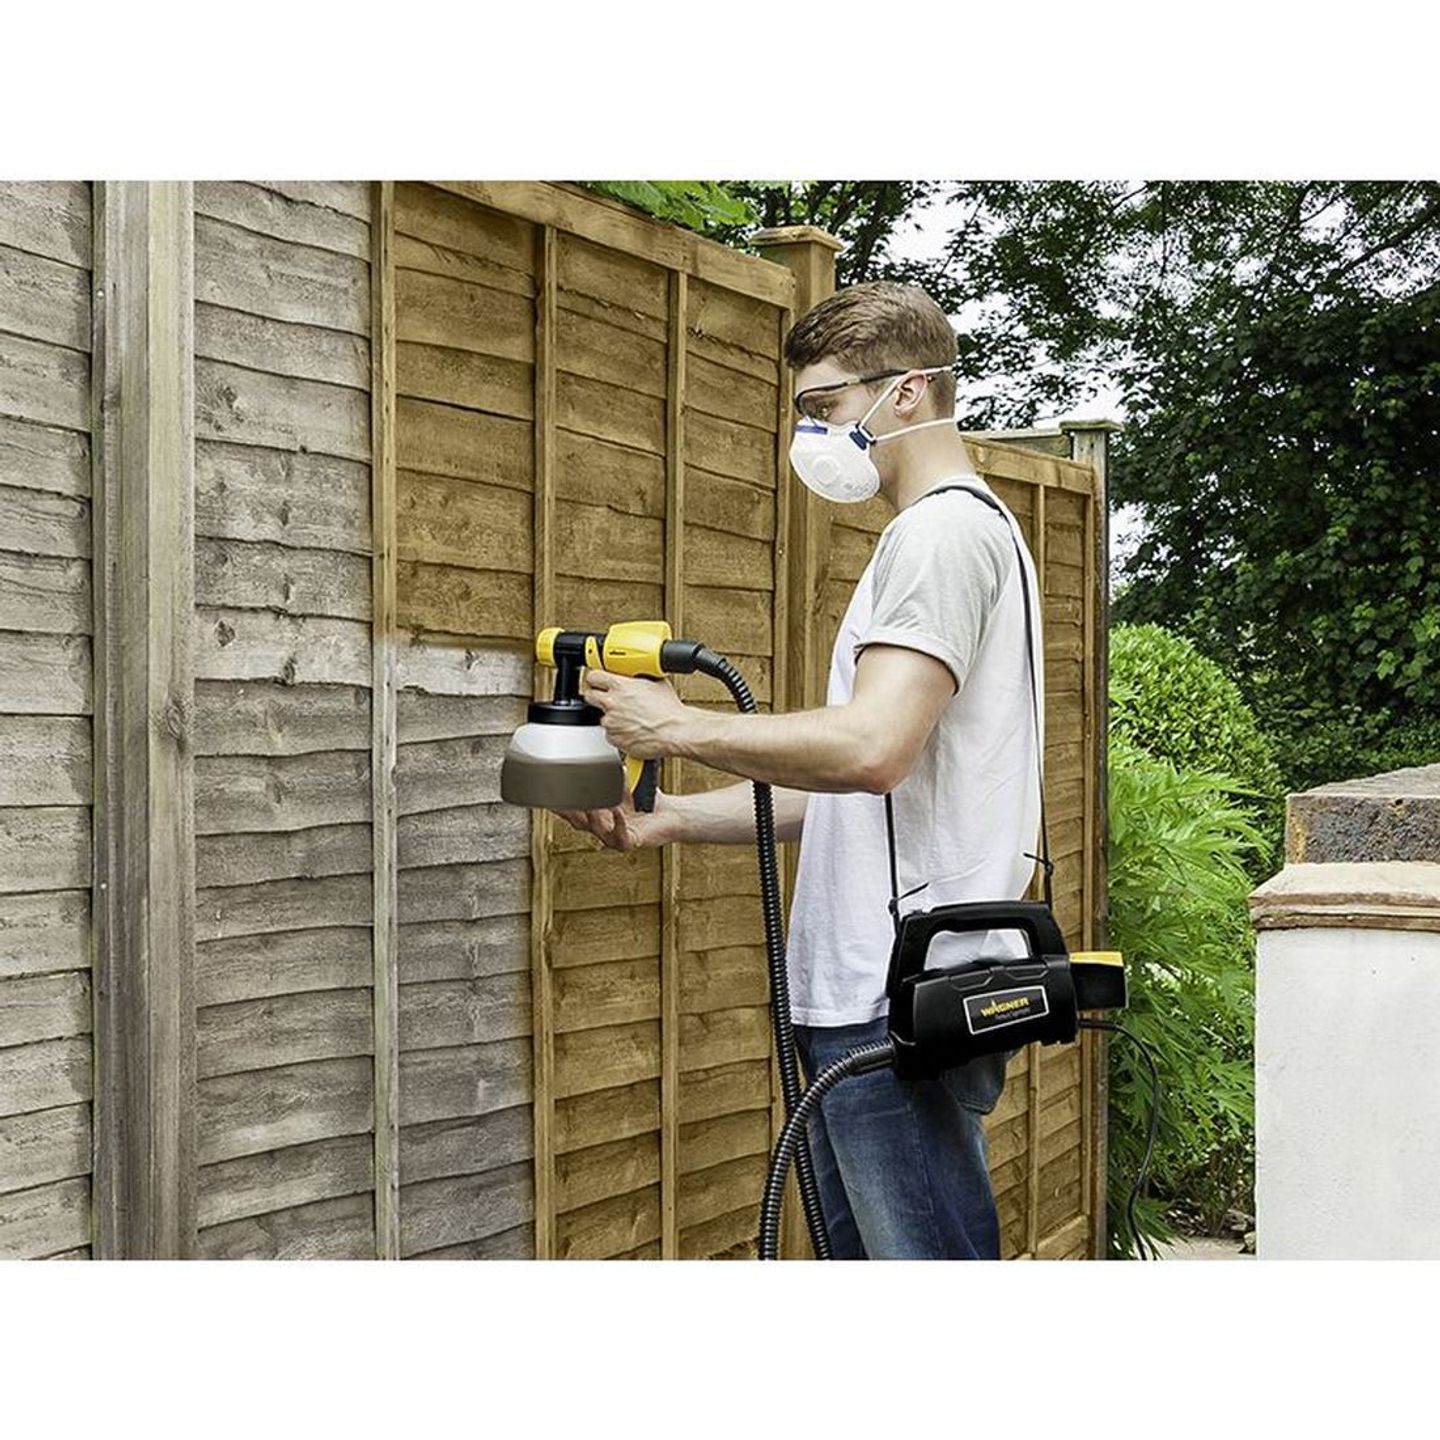
- Spray gun
- Paint
How do I paint a fence?
There are a few steps you'll need to follow to paint your fence perfectly and HSS DIY can help.
Let's get in to it.
What's the weather like?
Before you get going with painting your fence, make sure you’ve checked the weather.
The best type of day to paint your fence will be a dry day. Rain or drizzle is a big no-no for outdoor painting as the paint won't stick or dry properly.
If that happens you'll end up with a messy display with compromised protection.
Clear the area
Having things in your way when you're painting your fence will only delay the process and could also ruin your hard work.
- Tie back any shrubs or tree branches that touch the fence.
- Make sure to move any garden furniture out of the way too so you have good access to the fence.
- To avoid any paint spray or splashes, use tarpaulin or other sheets to cover the area at the base of the fence.
Now the area is clear, get your overalls, safety googles & mask on for the fence prep and painting stages.
Clean & smooth it over
We know you're eager to paint your fence but there's still some prep that needs to be done (you're almost there, we promise).
No one wants a dirty, rough garden fence!
Give your fence a quick clean with the stiff/wire brush and get any tough dirt off. Got more dirt & grime than you anticipated? Whip out your pressure washer to clean the fence instead to save yourself some time.
Once clean, check if your fence needs sanding down in any areas and get it smooth before painting with a sanding block.
If you don't, the paint won't stick properly and may start flaking.

It's prime time
Next, it's time to apply primer to the fence.
Primer helps the paint to stick better for longer to the timber & also helps your wooden fence developing mould in the future.
Let the painting commence
Now's the time to crack open your tin of paint and start applying to your fence.
You can choose between painting with a brush or a sprayer - it all depends on your preference.
If you're using a paint brush, make sure the brush is a perfect size. Too small and you may find you're painting job takes longer.
With a paint sprayer, it may not get in all areas so a brush may be needed for corners and other hard to places.
It's always best to start painting from the top to the bottom of your fence.
Apply the first coat of paint generously, making sure you go in the direction of the grain of the wood.
Depending on the type of paint you have, you might need to apply a second coat. Give your paint tin a quick read over and check the instructions for the best results.
Leave your fence to dry
With the painting process complete, all you can do now is let it dry.
Drying time may differ for each fence. Some may dry in 2 - 4 hours, whereas some fences may take 24 hours to dry.
When the last smudge of paint has dried, untie any trees and shrubs, put back your garden furniture back in it's rightful place and admire your hard work.
Clean your brushes
Before you sit back and relax in the your garden, give your paint brushes a decent clean before they dry out.
Keeping your brushes clean means you don't ruin their quality and can keep them for longer.
With our tips & tricks, you'll paint your fence like a pro!
Learning how to paint a fence is easier than you may have thought.
By having the right tools and following each step carefully means you can transform your garden fence in a matter of hours.
HSS DIY has all the painting tools you'll need for your fence makeover. If you need any help, get in touch with our live chat experts or pop in to your local HSS branch.
We're always happy to help.
FAQs
What colour shall I paint my fence?
You can paint your fence whatever colour your heart desires. Garden fences don't have to be the same colour. So if you fancy a red, blue, or white fence, the decision is in your hands.
Can I paint a wet fence?
We wouldn't recommend you painting your fence if it's wet. If you do, the paint may not adhere to the wood or it could peel, flake or crack once it has dried.
How can I paint a fence quickly?
To paint a fence quickly, it'll be best to use a paint sprayer as they can cover larger areas faster than if you were to use a paint brush.


