


We all know that when it comes to home improvement projects, saving money and time is a top priority.
Why not tackle some projects yourself?
Like removing floor tiles?
Not only does it save money on labour costs, but just think of the level of pride you'll feel knowing you've acquired a new skill and you've done the work yourself!
That's why we've put together this blog - to provide you with a step by step guide to remove tiles safely and effectively.
9 tools you'll need before removing floor tiles
Now that you've made the decision to complete the job yourself, you'll need to gather the right tools and equipment to ensure it's done with the utmost efficiency. The list below contains some essential tile removal tools:
- Masonry chisel
- Club hammer
- Dust sheets
- Hot air heat gun
- Pry bar
- Utility knife
- Heavy-duty floor scraper
- Ceramic tile drill bit
- Vacuum cleaner
Don't forget safety equipment...
Whether you're working with ceramic tiles or porcelain tiles, it's vital that you are both careful and vigilant to avoid injury from sharp edges on broken tiles.
Dust particles and debris will also be in the air for a long period of time. Asbestos floor tiles may be present in older homes - tile adhesives and tiles used at the time were often contaminated with carcinogens. If this is the case, you will need to speak to an asbestos professional.
You should obtain the following protective equipment:
- Safety goggles
- Dust mask
- Safety gloves
- Knee pads
- Plastic sheeting
Step 1: Prepare the working area
As with any flooring project, you'll need to clear the area of furniture and fixtures to complete the tile removal job with ease.
- Remove everything from the floor to avoid the risk of damage, this will also include doors, skirting boards and door frames.
- Place dust sheets or plastic sheets over any items that cannot be removed from the working area. This is the best way to minimise damage from shards of tile and dust during demolition.
- You should also take care to ensure you are wearing suitable clothing. Long sleeve clothing, steel cap boots and trousers are recommended.
- Seal off any vents with plastic wrap and masking tape as your HVAC system can be clogged with dust and debris when you remove hard tile.
Step 2: Locate a place to start the tile removal process
Before you start ripping out the old tiles, you'll need to find a place to start prying up the pieces of tile that are still intact. The easiest way to do this is by looking for a cracked tile or loose grout, anywhere where the underlayment is exposed.
- If you've located a weak spot in the tiling, utilise this space to push your chisel underneath the tile to pry it from the ground. With the chisel pushed and held underneath the loose tile at a 30 degree angle, hitting the tool with a mallet will free the tile from the base.
- Creating your own starting point may be necessary if you can't find one. The grout can be broken apart using a hammer and chisel. By cutting along the grout lines with a grout saw or rotary tool, you can loosen the grout. Your starting point can be achieved by prying up a tile with enough grout removed.
Step 3: Determine the type of underlayment
If you're looking to remove floor tiles effectively, you'll need to know what type of underlayment was originally installed. There are three options: mortar, cement backer board, or plywood.
You must be cautious when removing tiles from the underlayment depending on their type. When trying to salvage the underlayment, this is particularly important to keep in mind. Plywood, for example, will not withstand as much damage as cement.
Lifting tiles from solid mortar: A roto-hammer or hammer drill with a chisel attachment can simplify the task if your tiles were installed over a solid mortar base or concrete slab. In most cases, it can be most convenient to hire a floor tile stripper to effectively remove mortar, tile and debris from concrete surfaces.
Lifting tiles from plywood underlayment: Remove one row of tiles down each side and one row in the centre. Then, cut through the plywood in both directions carefully without cutting into the subfloor. With a pry bar or flat shovel, you should be able to rip out the plywood and tile simultaneously.
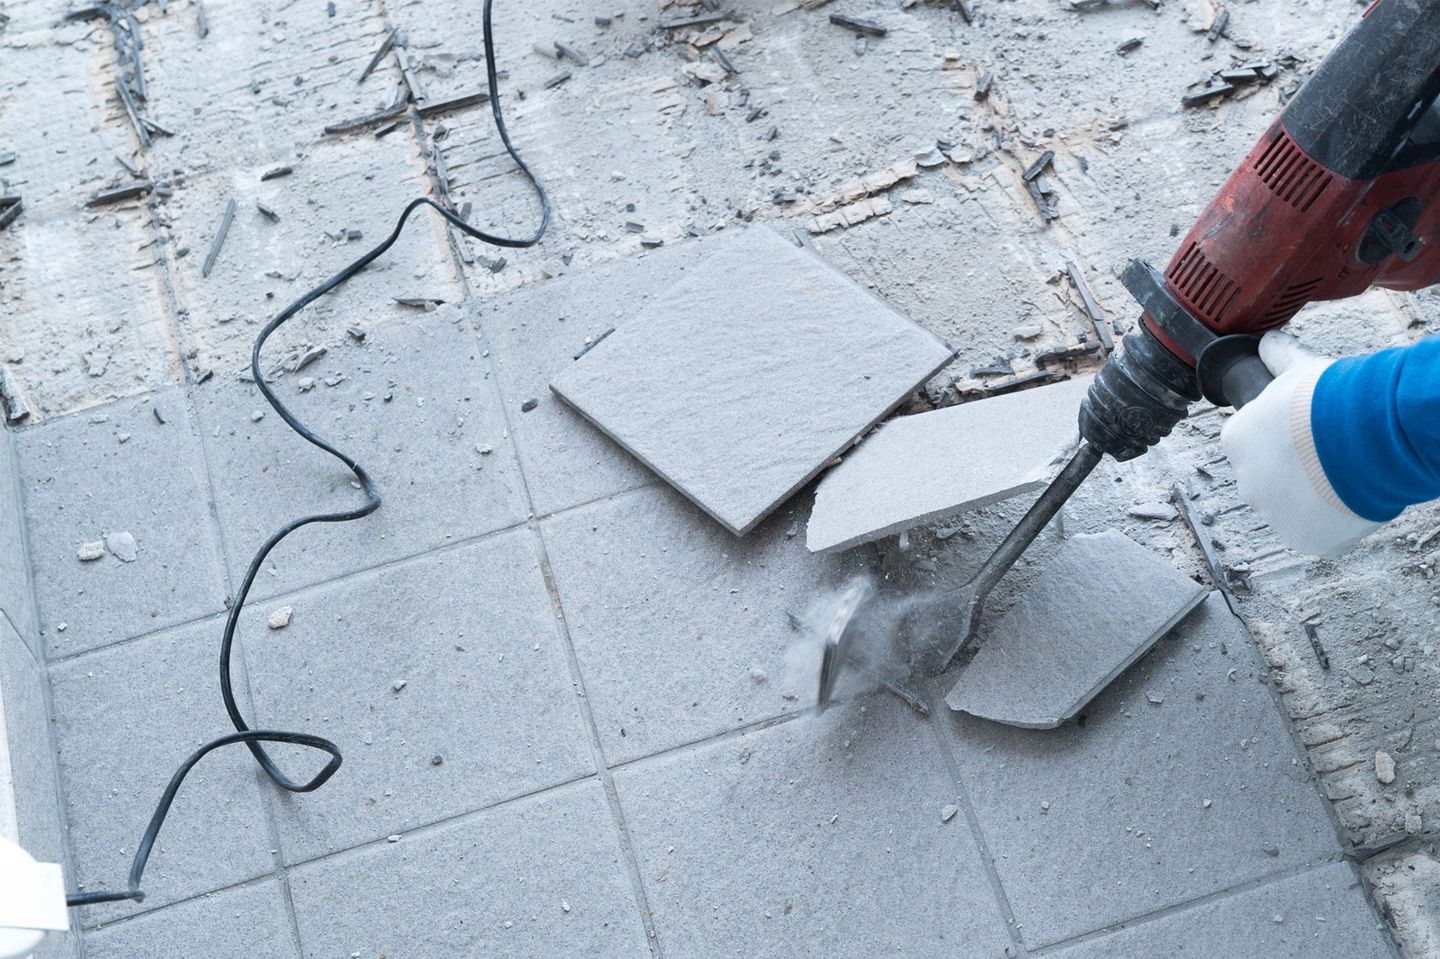
Step 4: Remove the surrounding tiles
Once you've broken the initial tile, this will allow access to the adjacent tile and make it easier to remove the rest of the floor tiling.
- Continue using your chisel and hammer to break each tile into pieces - this is where wearing safety glasses is essential in order to remain safe from chunks of tile!
- Switch to a long-handled floor scraper or air hammer with a chisel set to remove the majority of the tiles. This will speed up the job at hand and reduce the effort needed to lift each tile individually. You may still need to switch back to the chisel when removing tiles from the wall edge.
- Bits of tile build up very quickly during the process, it's handy to dispose of materials as you go along to reduce the load once the job is finished.
Step 5: Clean away any old tile adhesive
Once the tiles have been removed, there will be bits of adhesive left on the floor. You will not be able to tile over an uneven surface - try to clear as much of this as possible.
- Start at one end of the room, and use your chisel to chip away at any adhesive residue between each row of tiles. Be careful not to damage any surrounding materials such as wood trim, drywall or carpeting.
- Next, if there are any remaining stubborn tiles that need to be removed, gently pry them up with a flat-head screwdriver. If they don't come out easily, this means they're likely stuck to the adhesive below. In this case, you'll have to remove more of the tile adhesive before removing the tile completely.
How to remove tiles without breaking them
Tiling your home is an investment, you might want to salvage your newly laid tiles if you've had a change of heart or perhaps you're looking to relocate. If this is the case, it's important to take great care when removing the tiles so that they can be reused.
Removing tiles without breaking them can be a tricky job, but with the right tools, care and patience, you can remove and re-use your floor tiles.
If you need help removing floor tiles safely and effectively, follow these simple steps:
- First, use a utility knife to cut through any grout lines. Then, use a scraper or a hard plastic putty knife or grout saw to scrape out the tiles from the grout lines.
- Once you have cut along the grout lines, your putty knife should have cut deep enough to enable the tiles to be dislodged easily. Placing a suction cup in the middle of the tile should assist you in hoisting it from the ground.
- Continue the method above until all of the tiles are carefully removed.
Tools for removing floor tiles: Everything you need is here at HSS Hire
If you're looking for the tools and equipment to remove your floor tiles, you've come to the right place. Hiring tile-cutting and removal tools can be extremely handy in large areas.
HSS is the leading provider of tools and equipment, and we've got everything you need right here on our site.
- Floor tile removers: Eradicate the hassle of tile removal with an electric power tool. Tiles, lino, and other floor coverings will be easily and quickly removed and lifted with the help of this powerful breaker tool.
- Floor tile strippers: Unleash the power of a multi-functional tool that completes the entire job with ease. The floor tile strippers are suitable for lifting carpets, tiles, or linoleum. You can also use it to chip away mortar and plaster residues from concrete floors.
Take advantage of our wide availability, flexible loan terms and impeccable customer service for the prompt delivery of the tools you need most.
Need further advice? Pop into your local HSS store and speak to a member of our team.


