


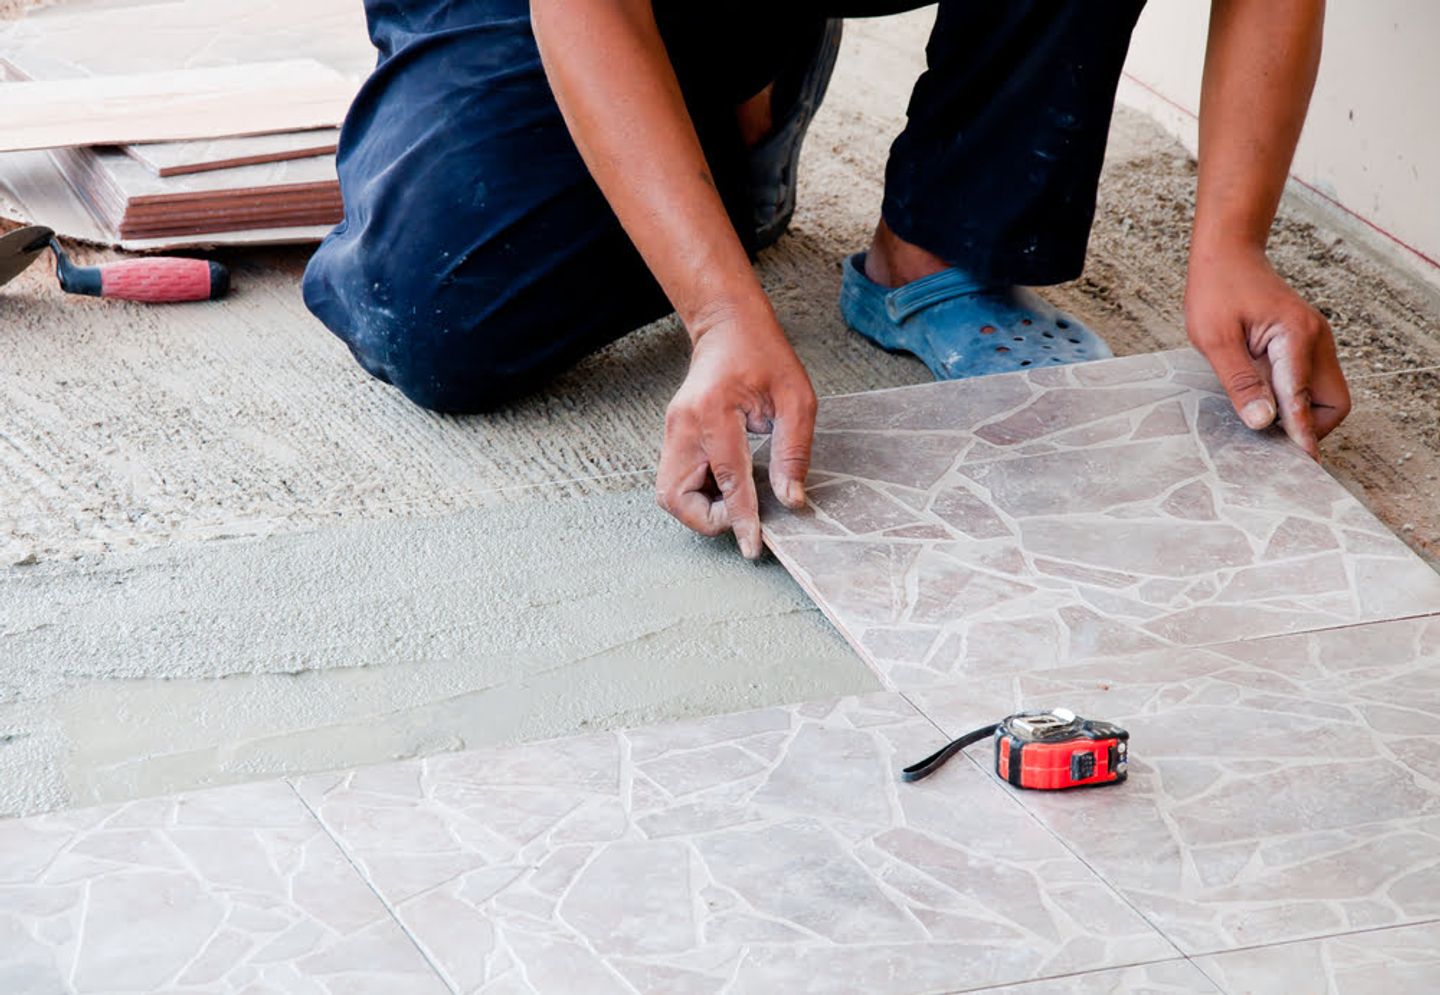
Tiling a floor can seem a daunting step for the amateur DIY-er, but it isn’t as tough as it might seem…
Hard tiling is an attractive and functional flooring choice for bathrooms and kitchens, and even hallways and conservatories. Being easy to clean and hard-wearing, it’s also great for high-traffic areas. If you’re already a bit of a tiling pro, learn some more tiling tips from our ‘Tips to Take Your Tiling Skills to the Next Level’ blog.
Alternatively, if you're looking for easy steps to follow to complete your tiling DIY project, HSS is here to for all of your home renovation needs.
How to tile a floor, safety first
Removing old tiling can be a nasty business so, for safety, it’s important that you wear strong, heavy-duty gloves to protect your hands. Also make sure to wear protective safety goggles and a dust mask to guard against flying tile shards.
What do you need for tiling? A complete checklist
You can't tile a floor without the right tools. When it comes to laying floor tiles, there are various pieces of equipment you can use to make the job easier. We'll walk you through the basics of what you'll need to get started, as well as some tips for making sure your floor is level and ready for tiling.
- Flooring materials: Your first step is to decide the type of tiles you want. You’ll have a range of options with various pros and cons. For example, ceramic tiles are durable and easy to clean, but they can be expensive. Vinyl tiles are more affordable but may not stand up to heavy foot traffic as well as ceramic tiles can. You can choose self-adhesive tiles or stick with traditional adhesives and grouts. You can even go for an adhesive membrane instead of grout if you want to install your tiles in a wet area like a shower or bathroom.
- Adhesive mortar: Adhesive is needed to make sure the tiles stay where they are and don't shift during installation. Look for Portland cement mortar - a thin-set adhesive made of a combination of cement and sand. If you're tiling over the top of a wooden floor, you should use a flexible tile adhesive and grout as these reduce the risk of cracking.
- Grout: Grout is a powdery substance that helps make your tiles look seamless and adds depth to your design. There are two types of grout: concrete and epoxy. Concrete grout is more porous and allows water to pass through it, which means it's good for outdoor applications or wet areas, like bathrooms or kitchens. Epoxy grout is less porous than concrete grout, but it has better resistance to stains. It's also easier to clean if something spills on it!
- Tile spacers: You can buy tile spacers, which can give your finished product a more professional look.
- Lever-action flat-bed cutter or heavy-duty tile cutter: For a precise and accurate fit, you may need to make alterations to your tiles. You can hire tile cutting equipment from HSS, ensuring all of your tiling is as neat as possible.
- Tiling tools: Tools you will need to be equipped with include: a margin trowel, spacers, a grout float and a tape measure. Have to hand a clean sponge to keep your floor tiling clean.
How to tile a floor: Where to start
- When measuring the area, make sure to include any awkward, jutting areas such as alcoves and round up to the nearest whole number. Tiles come in packs, and you’ll need to find out how much surface area each pack covers. You'll also need to leave enough space for the grout joint and sealant.
- Your hard tiling can be laid onto any dry and level concrete floor. If you're working with an uneven surface, you’ll need to even it out. You can lay tiles over existing vinyl or quarry tiles, though you need to make sure they are firmly and properly laid. If you’re laying over vinyl tiling, you should coat the surface with primer. Ideally you should use an adhesive specifically for the purpose, especially if you’re laying tiles onto wood or concrete.
- To achieve the ideal smooth surface, you can lay down tile underlayment. One of the most common types is a cement backer board, which will provide a strong and water-resistant base for your tiles. You can find it at your local hardware store in 4' x 8' panels or smaller.
- If you’re working on a timber floor, you will first have to strengthen it – use 13mm-thick exterior grade plywood, and fix it in place with 4mm gauge 25mm screws or ring-shanked nails at 30cm intervals.
Step one: It's time to tile!
Now that the preparation stage is complete, you can now begin your tiling.
- The “key tile” (the first tile that you’ll lay) will determine the whole layout of your tiling, so it’s important to get its positioning right. You have to start pretty centrally in your room and fan out in each direction, as most rooms aren’t perfect squares – if you start at the edge, you’ll end up with a real mess.
- From the centre of your room (the centre of the key tile), dry lay a row of tiles from one of the centre lines to the wall. If you end up with any gaps that would need tile fragments to fill once you reach the wall, you will need to reassess. If this happens, move your whole line the width of one tile away from this wall. Even if you end up with 1/3 tiles at each end, this will look better than untidy tile slithers along the skirting boards.
- When you’ve got this line right, carry on dry laying from this centre line. Then go in the opposite direction, and finally at right angles to it (ultimately, bisecting your central tile in a cross shape). When you’ve laid all this out, move your key tile around slightly until there’s a gap of around the size of half a tile around the edge of the whole room. Once your key tile is set, mark its position with chalk or another faint but visible marking.
- You’ll need to make sure all edge tiles are cut to shape at this stage, so now is the time to mark these up and cut them down.
Step two: Sticking those tiles down
- Start with the key tile and work out your direction across the floor from it. Bear in mind, when choosing your direction, that you shouldn’t walk on your newly laid tiles for 24 hours. Make sure you’ve left yourself a way to escape! Alternatively, you could just tile half a room per day, so the room isn’t fully out of action.
- Spread out around a metres-worth of adhesive in the centre of your room. Using a spreader, or notched trowel, spread the adhesive evenly across the square metre of surface. The spreader will leave just the right amount of adhesive to make the tiles stick, but make sure you can still see your markings representing the location of the key tile. Lay your first tile into position, twisting it slightly as you go. This gets rid of any air bubbles that may be stuck as you lower it and ensures the tile beds properly into the adhesive.
- Using plastic spacers, work out from the key tile in one direction towards the wall. Every metre or two, check that your floor is level using a spirit level. Once this row is complete, do the same at right angles, so your tiling criss-crosses the room from the key tile. Work in rows in one corner of the room, completing a quarter.
- Carry on laying until you’ve covered the floor, excluding the cut tiles needed for the edges.
- At this stage, wipe down all your tiles to make sure no adhesive sticks permanently, ruining your lovely new tiling.
- Make sure to scrape up any adhesive where the edge tiles will go – you need your surface to remain flat. You now need to wait 24 hours before the final steps.
Step three: 24 hours later
- Having cut your tiles (using a lever-action flat-bed cutter or heavy-duty tile cutter), you can now fill the edging. Squeeze a layer of adhesive onto the back of each tile then press it into position, again leaving it 24 hours to set.
Step four: Grouting time!
- Make sure the adhesive is solidly set before you move onto grouting. Now make sure to make up your grout well (most require mixing with water) – any lumps will show an unequal and unprofessional surface in your end result. Leave your grout to sit for 2-3 minutes once made up, unless otherwise recommended, as this can help break down lumps and release air bubbles. N.B: for the edges of the room, you are better to use a flexible sealant rather than the grout to allow for movement and flexibility as the tile meets the wall.
- If you’re using glazed tiles, you can simply pour the grout over and use a grout spreader with a rubber edge to squeegee the grout into place. If you have non-glazed tiles, you’ll need to be more careful – prepare a very dry grout mix and gently put it into each crack, trying to avoid getting any grout onto the tile surface to avoid stains.
- You'll need to remove excess grout using your rubber float, carefully dragging it across the tiles diagonally to ensure a seamless finish.
- As the grout begins to set, go over it with a wooden dowel or striking tool, pressing the grout firmly to fill any gaps or air pockets. Carry a dry sponge and wipe up any mess as you go. All of the grout has to be compacted, without gaps, to ensure water resistance.
- Once the grout lines are dry (after approximately an hour), wipe all over again with a damp cloth, focussing on each tile one by one to make sure no grouting stains have escaped your attention.
- Try to avoid using the floor for 48 hours if at all possible; otherwise, be gentle and delicate for this period.
- Seal around the corners of the room with a flexible sealant of the same colour as your grout, and there you have it – one floor tiled!
Getting equipped for tiling by hiring DIY equipment from HSS
We know that DIY tasks can be as stressful as they are time-consuming (and complex in many cases!). That's why we make home projects easier by offering a wide range of tools that help you complete jobs with ease.
From surface preparation tools to floor tile remover kits, we've got you covered every step of the way.
For further help and advice on how to tile a floor and tiling equipment, visit your nearest HSS branch ahead of your next project!


